在word2010中怎么设置表格外框线和内框线(图文步骤)
2023-02-19 07:49:39 作者:小米儿Sunny 文章来源:66软件下载 阅读次数:29
在word2010中怎么设置表格外框线和内框线,一起来看看具体的方法。
在word2010中怎么设置表格外框线和内框线详细步骤
步骤1:
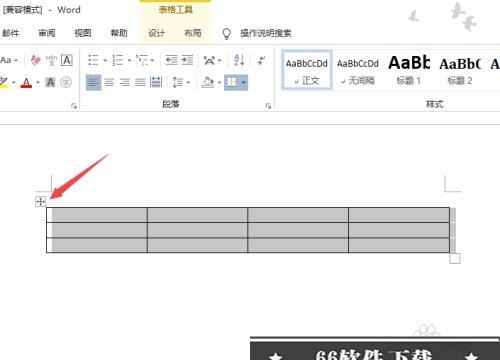
第一步,打开一个含有表格的word文档,之后点击表格的左上角按钮从而选中表格;
步骤2:
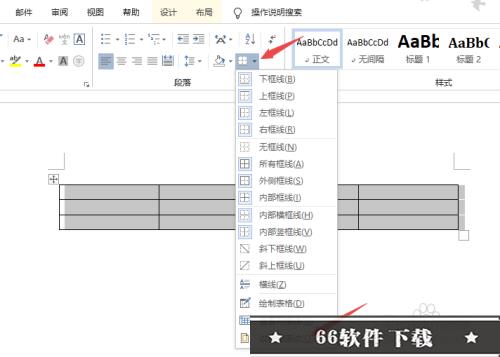
第二步,然后点击边框按钮边上的下拉箭头,选择边框和底纹;
步骤3:
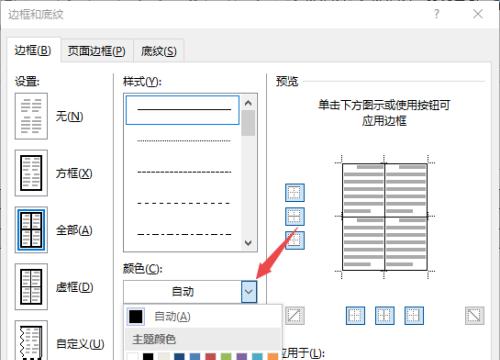
第三步,然后点击颜色边上的下拉箭头,选择红色;
步骤4:
第四步,之后点击取消掉中间的边框,只保留外围边框;
步骤5:
第五步,然后点击颜色边上的下拉箭头,选择另外一个颜色;
步骤6:
第六步,之后点击边框的内部,然后点击确定;
步骤7:
第七步,结果如图所示,这样我们便设置好表格的外框线和内框线了。
 遇见逆水寒驿站小报答案大全
 三国志重制版相生机制解除
 金棘兽繁殖攻略
 手机投屏到投影仪的5种方法
 华为怎么解除禁止恶意应用安装其他应用
 夸克浏览器如何投屏到电视
 墨客岛
墨客岛 极目新闻
极目新闻 综评学生版安装
 Emoji表情贴纸
 抖查查
抖查查 列王的纷争腾讯版
 奥特曼宇宙英雄免费充值版
 Phigros安卓最新版
 仙凡幻想华为客户端下载
 请出示证件手机汉化版下载